|
Unlocking an AMD Thunderbird Core Athlon/Duron
First off, you will need to find a 2B pencil. While a standard 2B pencil will
do, a 2B Mechanical Pencil saves a lot of time sharpening. And yes, I know it
sounds ridiculous but all you need is a pencil! (hence the name :P). 2B pencils
are best to use because they have a high graphite content which means the lead
will conduct electricity well enough for this to work. If you can't get or don't
have a 2B pencil then try and find the closest type you can.
Now make sure the pencil is extremely sharp! Sit there for 5 minutes or so sharpening
the pencil so you can get it as fine as possible! (That's if you didn't go the
intelligent way of using a mechanical pencil :P) Believe me, the way I'm about
to show you needs it to be a fine point!
Now remove your HSF, undo the ZIFF retention socket and take out your CPU.
Clean off all thermal goop so as to remove any visual obstructions. This may
also be a good time to write down your CPU stepping and batch codes for later
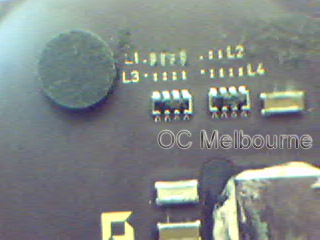
reference. If you look VERY closely you will see four sets of four small copper
traces. These are set side by side. Beside each set of four you will notice
it says L1, L2, L3 and L4. The ones we are interested in are the L1 set.
Click to enlarge
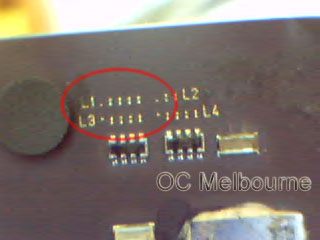
If you have a magnifying glass then you can take a closer look and will notice
that the L1's aren't joined. They are cut by laser at factory, locking the multiplier.
But when they are joined the multiplier can be changed. Yep, you guessed it!
We're going to join them up.
Now grab that very sharp pencil (now do you see why I said it has to be sharp?)
and go up and down each L1 bridge carefully. Be sure not to join two of the
bridges that are side by side. If you do accidentally join them up, just grab
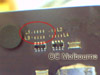
an eraser and start again. Simple as that! Now once you're happy with the final
result and looks something like this:
Click to enlarge
Now you'll have to re-apply some goop. This will make your temps lower, allowing
a higher overclock. The best way to do this is to grab an ID card or something
of the such, put a tiny bit of goop on there and wipe it lightly over the bottom
of the HSF. Try and get the thinnest layer you can. Put the CPU back in and
put the HSF back on (of course).
< < Back - Page One || Next - Page Three >>
|